
How do I set the host name and port in a config file for Windows, using OpenSSH through PowerShell?
As on Unix/Linux:
0Edit or create the file now by typing:
nano ~/.ssh/config
In here, you can set host-specific configuration options. To specify your new port, use a format like this:
Host remote_alias HostName remote_host Port port_num
This will allow you to log in without specifying the specific port number on the command line.
3 Answers
In Windows 10 with PowerShell, the configuration files are not created, so we have to create them ourselves.
This answer was done with: Windows 10 PRO 20H2 (Build 19042.804)
And with the last OpenSSH-Portable (v8.1.0.0p1-Beta) from the official GitHub here
NOTE 1 : Here I show how to configure only the configuration file "config" in the folder .ssh, which should be in the user folder $HOME\.ssh , because it is what is required, normally, it seems to me that the other files are created automatically when one Install Open-SSH server. if this is not the case, simply adapt the command lines
NOTE 2 : Have Git for Windows and OpenSSH-portable can cause problems for the configuration of the agent, so you should know that it is the SSH-Agent uses by the Windows service
You can find out which ssh-agent is used by the Windows service with this command :
Get-WmiObject win32_service | ?{$_.Name -like 'ssh-agent'} | select PathName If the Get-WmiObject command no longer works you can use the Get-CimInstance command which should be its definitive successor for new versions of PowerShell
# Create the config file with Powershell New-Item -Path $HOME\.ssh\config -ItemType File # Open config File with Notepad C:\WINDOWS\System32\notepad.exe $HOME\.ssh\config # or Open file with Visual Code code $HOME\.ssh\config After that, you can configure the SSH configuration file as you want with the same syntax as on Linux
Little example
# Config for use specific key for github Host github.com HostName github.com User git IdentityFile ~/.ssh/id_ed25519_github IdentitiesOnly yes # For server 172.x.x.x Host 172.x.x.x User user Port 2121 IdentityFile ~/.ssh/id_ed25519 IdentitiesOnly yes # For all other servers Host * User root Now you can test your config like that :
# For Github ssh -T # For other # It is possible not to put the user to check, # if you have indicated a specific user # in the conf file, to test if the configuration # will connect well with this user ssh -T 172.x.x.x If ssh doesn't work, this is because you don't have the OpenSSH folder in your environment variables, you can add it to your system environment variable like that in Powershell if you install
OpenSSH Binary in C:\Program Files
and the folder name is OpenSSH-Win64
# PowerShell admin # Add folder OpenSSH to your System Environnement [System.Environment]::SetEnvironmentVariable('OPENSSH', 'C:\Program Files\OpenSSH-Win64', [System.EnvironmentVariableTarget]::Machine) Other Command
# Generate EdDSA Key ssh-keygen.exe -t ed25519 -a 100 -o -C "" -f "$HOME\.ssh\id_ed25519_example.com" # Config the SSH Agent service # For start the service when logon Set-Service ssh-agent -StartupType Automatic # Start the SSH Agent Start-Service ssh-agent # Restart service always when you change the config file Restart-Service ssh-agent # Add the key to the SSH Agent ssh-add $HOME\.ssh\id_ed25519_example.com The OpenSSH configuration and key files (including the config, known_hosts, authorized_keys, id_rsa, etc.), which on *nix go to ~/.ssh, on Win32-OpenSSH they go to %USERPROFILE%\.ssh.
That typically is:
C:\Users\username\.ssh After OpenSSH installs, perform some additional configuration steps.
Ensure that the OpenSSH folder is included on the system path environment variable:
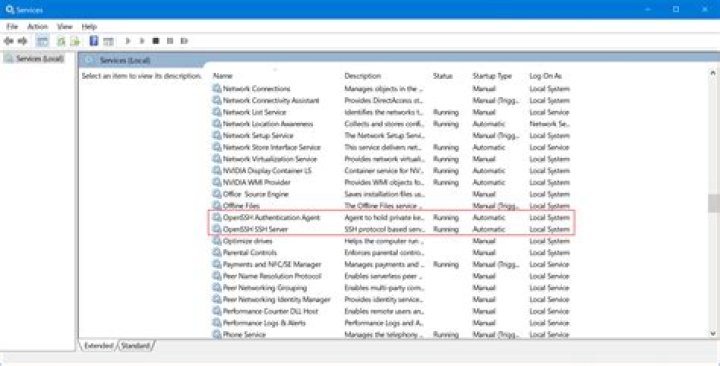
C:\Windows\System32\OpenSSH\ if installed as the Windows optional feature C:\Program Files\OpenSSH\ if installed via the OpenSSH download Set the two services to start automatically:
# PowerShell Admin # Config services sshd and ssh-agent # for start automatic when logon Set-Service sshd -StartupType Automatic Set-Service ssh-agent -StartupType Automatic If you installed OpenSSH with the optional feature, then Windows creates a new firewall rule to allow inbound access of SSH over port 22. If you installed OpenSSH from the download, then create the firewall rule with this command:
# PowerShell Admin # Add FireWall Rules for OpenSSH Server New-NetFirewallRule -Name sshd -DisplayName 'OpenSSH Server (sshd)' ` -Enabled True -Direction Inbound -Protocol TCP ` -Action Allow -LocalPort 22 Start the sshd service to generate the SSH keys:
# PowerShell Admin Start-Service sshd The SSH keys and configuration file reside in C:\ProgramData\ssh, which is a hidden folder. The default shell used by SSH is the Windows command shell. This needs to change to PowerShell:
# PowerShell Admin New-ItemProperty -Path "HKLM:\SOFTWARE\OpenSSH" -Name DefaultShell ` -Value "C:\Program Files\PowerShell\6\pwsh.exe" -PropertyType String -Force Now, when you connect to the system over SSH, PowerShell Core will start and will be the default shell. You can also make the default shell Windows PowerShell if desired.
There's a bug in OpenSSH on Windows. It doesn't work with paths with a space, such as the path to the PowerShell Core executable! The workaround is to create a symbolic link that creates a path that OpenSSH can use:
# PowerShell Admin New-Item -ItemType SymbolicLink -Path C:\pwsh -Target 'C:\Program Files\PowerShell\6' In the sshd_config file, un-comment the following lines:
PubkeyAuthentication yes PasswordAuthentication yes Add this line before other subsystem lines:
Subsystem powershell C:\pwsh\pwsh.exe -sshs -NoLogo -NoProfile This tells OpenSSH to run PowerShell Core.
Comment out the line:
AuthorizedKeysFile __PROGRAMDATA__/ssh/administrators_authorized_keys After saving the changes to the sshd_config file, restart the services:
# PowerShell Admin Restart-Service sshd Start-Service ssh-agent You need to restart the sshd service after any change to the config file.
4