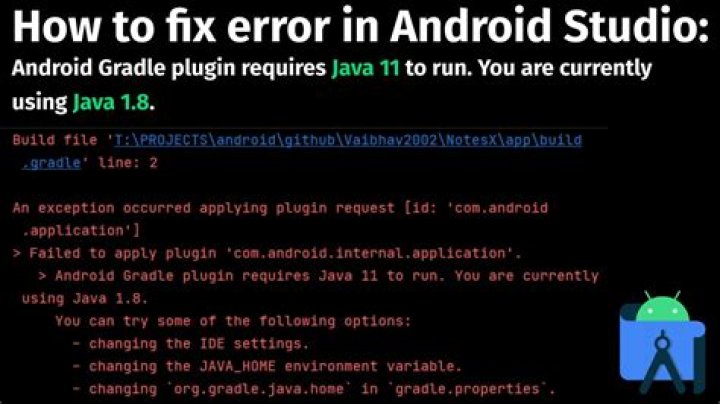
I downloaded the newest Android Studio, and I wanted to run the Android Jetpack Compose Project, but when I ran it, I got the error:
> Failed to apply plugin 'com.android.internal.application'. > Android Gradle plugin requires Java 11 to run. You are currently using Java 1.8. You can try some of the following options: - changing the IDE settings. - changing the JAVA_HOME environment variable. - changing `org.gradle.java.home` in `gradle.properties`. I already downloaded Java 11 and added Java 11 in gradle.properties.
org.gradle.java.home=/Library/Java/JavaVirtualMachines/ The JAVA_HOME shows Java 11, but when I run, it doesn't work - /Library/Java/JavaVirtualMachines/
How should I do?
My Android Studio version
My Java version
java 11.0.10 2021-01-19 LTS Java(TM) SE Runtime Environment 18.9 (build 11.0.10+8-LTS-162) Java HotSpot(TM) 64-Bit Server VM 18.9 (build 11.0.10+8-LTS-162, mixed mode) My gradle-wrapper.properties
distributionUrl=https\:// build.gradle classpath
classpath "com.android.tools.build:gradle:7.0.0-alpha13" classpath "org.jetbrains.kotlin:kotlin-gradle-plugin:1.4.31" File build.gradle
plugins { id 'com.android.application' id 'kotlin-android' } android { compileSdk 30 defaultConfig { applicationId "com.example.testandroid3" minSdk 21 targetSdk 30 versionCode 1 versionName "1.0" testInstrumentationRunner "androidx.test.runner.AndroidJUnitRunner" vectorDrawables { useSupportLibrary true } } buildTypes { release { minifyEnabled false proguardFiles getDefaultProguardFile('proguard-android-optimize.txt'), 'proguard-rules.pro' } } compileOptions { sourceCompatibility JavaVersion.VERSION_11 targetCompatibility JavaVersion.VERSION_11 } kotlinOptions { jvmTarget = "11" useIR = true } buildFeatures { compose true } composeOptions { kotlinCompilerExtensionVersion compose_version kotlinCompilerVersion '1.4.31' } } java { toolchain { languageVersion.set(JavaLanguageVersion.of(11)) } } dependencies { implementation 'androidx.core:core-ktx:1.3.2' implementation 'androidx.appcompat:appcompat:1.2.0' implementation 'com.google.android.material:material:1.2.1' implementation "androidx.compose.ui:ui:$compose_version" implementation "androidx.compose.material:material:$compose_version" implementation "androidx.compose.ui:ui-tooling:$compose_version" implementation 'androidx.lifecycle:lifecycle-runtime-ktx:2.3.0' implementation 'androidx.activity:activity-compose:1.3.0-alpha02' testImplementation 'junit:junit:4.13.2' androidTestImplementation 'androidx.test.ext:junit:1.1.2' androidTestImplementation 'androidx.test.espresso:espresso-core:3.3.0' androidTestImplementation "androidx.compose.ui:ui-test-junit4:$compose_version" } 33 Answers
Make sure that your Gradle is using the proper JDK. Try running ./gradlew --version in your project's directory. The output should be something like this:
Gradle 7.0-rc-2 ------------------------------------------------------------ Build time: 2021-04-01 21:26:39 UTC Revision: 912a3368b654b71250dfc925a20d620393 Kotlin: 1.4.31 Groovy: 3.0.7 Ant: Apache Ant(TM) version 1.10.9 compiled on September 27 2020 JVM: 11.0.10 (Ubuntu 11.0.10+9-Ubuntu-0ubuntu1.20.10) OS: Linux 5.11.4-051104-generic amd64 If the JVM points to version 1.8 then you should change it in settings. You can find it in Preferences → Build, Execution, Deployment → Build Tools → Gradle → *Gradle JDK.
For Android Studio Arctic Fox (4.2), with 2020.3.1 Patch 2 on Windows 10 Pro PC:
Step 1
Step 2
If you are using Android Studio (Arctic Fox 2020.3.1) on Windows 10.
This is how you fix the Build failed error:
Android Gradle plugin requires Java 11 to run. You are currently using Java 1.8
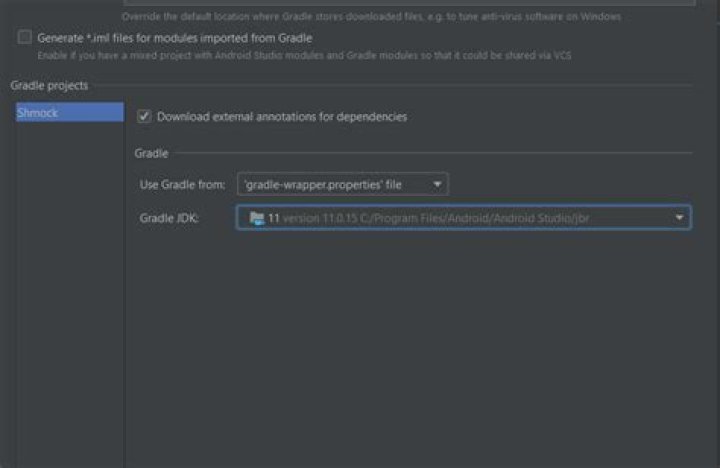
Open the Project Structure...
(from the Toolbar)
(or from the File Menu)
Click on the Gradle Settings link
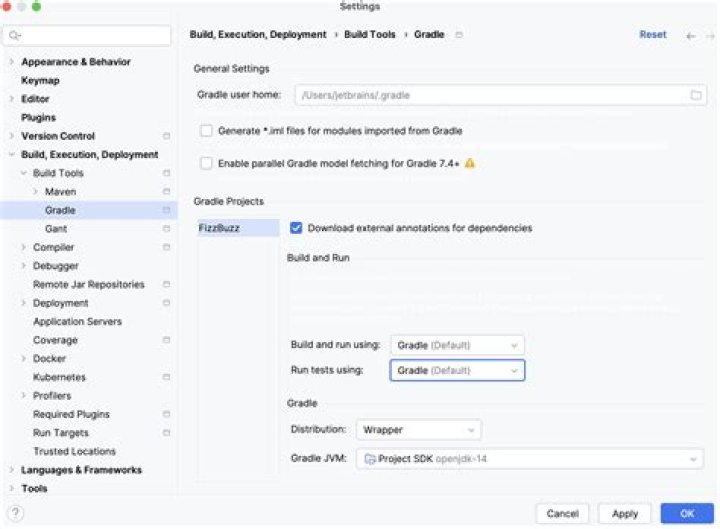
Select the correct Java JDK from the Gradle JDK drop-down list
NOTE: If you cannot find the correct Java JDK, then you'll first need to download and install it...
8Android Studio Arctic Fox (4.2) with 2020.3.1 Patch 3 - Mac
You just need to choose the embedded JDK version 11.0.10 from the Gradle settings of preferences.
This is how I fixed it on macOS.
./gradlew --version
Go to Preference -> Build, Execution, Deployment -> Gradle
Change the Gradle JDK to your latest version.
I have only one JDK (Microsoft build OpenJDK 17) installed before installing Android Studio, for unknown reason a JDK 1.8 has been installed along Android Studio and set as gradle default at /Users/<username>/Library/Java/JavaVirtualMachines/corretto-1.8.0_322
You can solve it in this simple way.
Download the JDK ZIP file of your system. (Let’s say Windows)
Extract it in any folder with high permissions under your PC main directory
Now open and Go to your Android studio project structure located at men File* → Project structure.
And paste the directory where you unzipped the JDK version here. As you see, mine is JDK 16 as at now and installed in that directory as seen in the picture:
I got this error when I started gradlew ktlintFormat in the Terminal of Arctic Fox build.
I opened Project Structure (menu File → Project Structure) and selected Java 11, but it didn't help even after a restart of Android Studio.
Then I changed the Java path in Settings (see the accepted answer), but it didn't help. You should set it.
I tried to change Windows system variables and changed
JAVA_HOME.(A short way: run
cmdwith administrative rights and write:setx /M JAVA_HOME "C:\Program Files\Java\jdk-11.0.11", and then restart Android Studio)Press Win+X, press "System", and enter "va".
I pressed Edit button and "Browse Directory...", and then selected JRE (or JDK) folder (without
bin) of Java 11. Then OK, and OK (as always).I opened
cmd(command line in Windows) and typed:%JAVA_HOME%. It wrote me this error:'C:\Program' is not recognized as an internal or external command, operable program or batch file.
Looking at Setting the JAVA_HOME Variable in Windows, I found that we should replace
Program FileswithProgra~1(yes, this DOS trick still works). So, replace JAVA_HOME again like in the picture below.Restart Android Studio or reset the computer.
I got this error when I updated one of the dependencies in Android Studio that requires Java 11. You just need to follow these steps.
Download the Java 11. For Mac, download a .dmg file and for Windows a ZIP file. Link: Download Java 11
Select options at Android studio
Follow the steps and choose your newly saved Java SDK
Follow the steps and choose your newly saved Java SDK.
(Follow the steps and choose your newly saved Java SDK.)
If the JVM points to version 1.8 then you can change it form the android studio settings. You can Click on File-->Setting-->Build, Execution, Deployment → Build Tools → Gradle → *Gradle JDK. And Apply then click on OK
If you want a video solution see a hare Video
If you are currently using Android Studio Arctic Fox (4.2):
- You can set manually the Gradle JDK (menu Preferences → Build Tools → Gradle → Gradle JDK (use or download JDK 11))
- Restore the default setting and don't do the previous tip in all projects (menu File → Manage IDE settings → Restore Default Settings)
I was just having the same problem -
Android Gradle plugin requires Java 11 to run
Resolve it by replacing the value of Gradle JDK, "JDK 1.9" by "Android Studio SDk default JD 11.0.11" in menu Settings → Build, Execution, Deployment → Build Tools → Gradle.
Latest Answer : you can do this way
On Mac, only setting JAVA_HOME to JDK 11 embedded to Android Studio helped.
I did it with this command in the command line:
export JAVA_HOME=ENTER_PATH_TO_JDK_HERE PATH_TO_JDK could be something like /Users/userName/Library/Application\ Support/JetBrains/Toolbox/apps/AndroidStudio/ch-0/203.7583922/Android\
The new Gradle version needs Java 11. You need to download Java 11 and update in to Gradle.
Firstly you need to check your current JDK version. './gradlew --version'. Use this comment in your project terminal to know current using JDK version. You will get the below image:
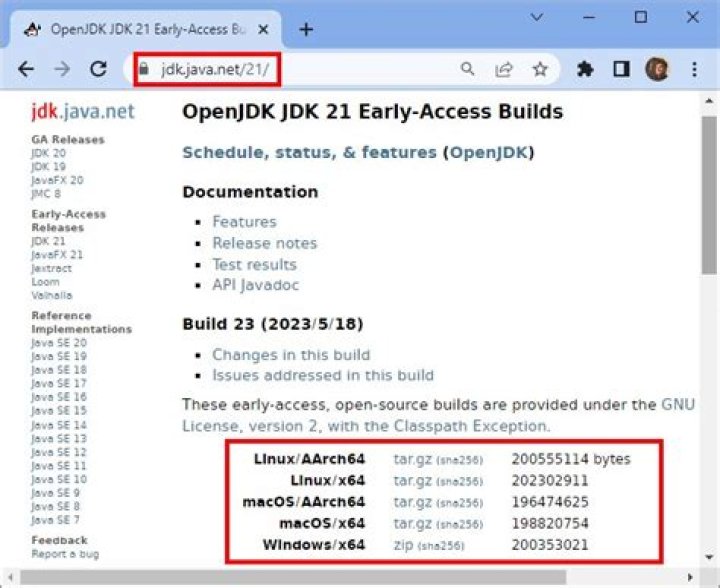
If JVM points to version 1.8 then you should change it in settings.
For Ubuntu and Windows: Menu File → Settings → Build,Execution,Deployment → Build Tools → Gradle → Gradle JDK. Please check the below image:
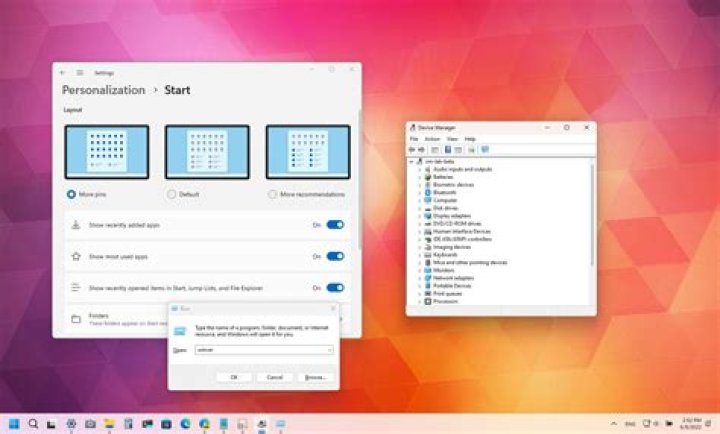
For Mac: Preferences → Build → Execution, Deployment → Build Tools → Gradle → Gradle JDK.
It’s working perfectly for me.
5I have concluded that Gradle calls the version of Java installed on the system, regardless of Android Studio settings.
On macOS, check the list of installed Java versions in the system with the command:
/usr/libexec/java_home -V If there is no Java 11 or higher among them, you will get an error like the author of the question.
The solution is to install the Java 11 or higher.
The second solution is to make a symlink in the folder ~/Library/Java/JavaVirtualMachines/ to the JRE embedded in Android Studio with the command:
ln -s "/Applications/Android " "~/Library/Java/JavaVirtualMachines/Android Studio Default JRE" Additionally you can add this line to ~/.zshenv:
export JAVA_HOME=/usr/libexec/java_home You can get installation paths for different Java versions if needed:
/usr/libexec/java_home -v 11 or
/usr/libexec/java_home -v 1.8 All the solutions here are helpful for Java 11. But if you don't want to upgrade to Java 11 then you should just downgrade ADP to 4.X as shown below:
If you are using MS App Center, you may face the same kind of issue when you use JAVA 11 in your android project. If you are looking a solution for MS App Center issue, This may help you!
- Go to
- Click settings icon to go to
Build configuration - Scroll down to
Environmentand turn on. - Set
JAVA_HOMEto$(JAVA_HOME_11_X64)
I ran into a similar problem when trying to run the benchmarking samples for the first time.
The instructions to run the sample were to execute
./gradlew macrobenchmark:cC
in the IDE terminal, but in my case this resulted with the same error.
I had tried the accepted answer above from M Tomczyński above, but that didn't work for me. I believe this was as a result of my existing config for JAVA_HOME (which can be found here).
This also meant that option 2, changing my JAVA_HOME config, wasn't an option.
The change which did work for me though was option 3 in the suggestions above. I checked the path for Java 11 from the answer above and added that into gradle.properties, and then sync'd gradle as per the IDE prompt, and re-ran the macrobenchamark gradle command successfully.
org.gradle.java.home=/Applications/Android Studio
For MacOS users
Bundled JDK into MacOS is 1.8, but now we need 11. Make gradle use AndroidStudio's JDK for building project:
Into file <PROJECT_ROOT>/gradle.properties add line:
org.gradle.java.home=/Users/.../Library/Application Support/JetBrains/Toolbox/apps/AndroidStudio/ch-0/.../Android Changing the Gradle JDK to 11 worked for me in Android Studio Arctic Fox (4.2):
Step 1:
Navigate to: menu File → Setting → Build, Execution, Deployment → Build Tools → Gradle
Step 2:
Change Gradle JDK to 11, below the Gradle Projects.
Step 3:
Apply, and Rebuild Project!
1My problem was that I was using Android Studio version before Arctic Fox (4.2). And it seems that only Arctic Fox supports JDK 11.
If you don't want to use JDK 11, and still want to use JDK 1.8, you can revert back the android plugins as below.
plugins { id 'com.android.application' version '4.2.0' apply false id 'com.android.library' version '4.2.0' apply false } If you run into this problem from the terminal in Android Studio, you should configure JAVA_HOME in your environment into java 11, set the gradle jdk in Perferences can't solve. I guess that running the gradle from terminal and running gradle from ide are not the same process and they use different jdk location.
⚠️ Note: this is a solution if you are getting this error on the Github Actions Pipeline
If you are using Java 11 in your project, but the Github Action Pipeline that builds the App is set to use Java 1.8, you will get this error.
To fix it, replace the following:
- name: set up JDK 1.8 uses: actions/setup-java@v1 with: java-version: 1.8 with:
- name: set up JDK 11 uses: actions/setup-java@v1 with: java-version: 11 None of the above worked for me in Android Studio Artic Fox | 2020.3.1 Patch 3.
Only adding org.gradle.java.home=<Path-to-JDK-v11> to gradle.properties worked in my case.
If you are using linux just add org.gradle.java.home=/opt/android-studio/jre.
In Windows I got This error when upgrade React native v0.67 to 0.68 from CMD of directory without install update openjdk 11. first I install
choco source add -n chocolatey -s ' then I run this
choco install -y nodejs-lts openjdk11 //without nodejs-lts i have already install node hope it work for someone
For the latest version, this works for my windows machine
File -> Project Structure
Choose the JDk 11 from you machine that you installed
Click 'Apply' and 'Ok'.
Restart your android studio after these changes
Now, you're good to go
What worked for me:
- Deleting the folder for JDK 1.8 in my user folder.
- Restarted Android Studio.
- Android Studio dropped down a bar at the top of the screen asking if I wanted to change which JDK to use or redownload 1.8.
- I selected JDK 16 and all worked!
For me it’s as simple as making sure I'm using the Gradle JDK located in [Android Studio installation path]/jre.
Try it. It might also work for you.
I saw this because on my Bitbucket server with pipeline set up, I needed to build from the docker-android-sdk/android-28 image which is packaged with openjdk-8.
I added the following line to my bitbucket-pipelines.yml file to install openjdk-11 before running the Gradle build:
- apt-get install -y openjdk-11-jdk